Do you own an Apple HomePod but don’t know how to connect it to your WiFi? Don’t worry! This guide will show you how to link your HomePod to your home’s network. You’ll learn how to set it up, why WiFi is important, and how to fix any connection problems.
Key Takeaways
- Learn the essential steps to connect your HomePod to your home’s WiFi network
- Discover the benefits of a strong WiFi connection for your HomePod, including seamless streaming and voice control
- Identify and resolve common WiFi connection problems for your HomePod
- Prepare your HomePod and gather the necessary information to ensure a smooth setup process
- Follow a step-by-step guide to connect your HomePod to your wireless network
Understanding the Importance of Connecting Your HomePod to WiFi
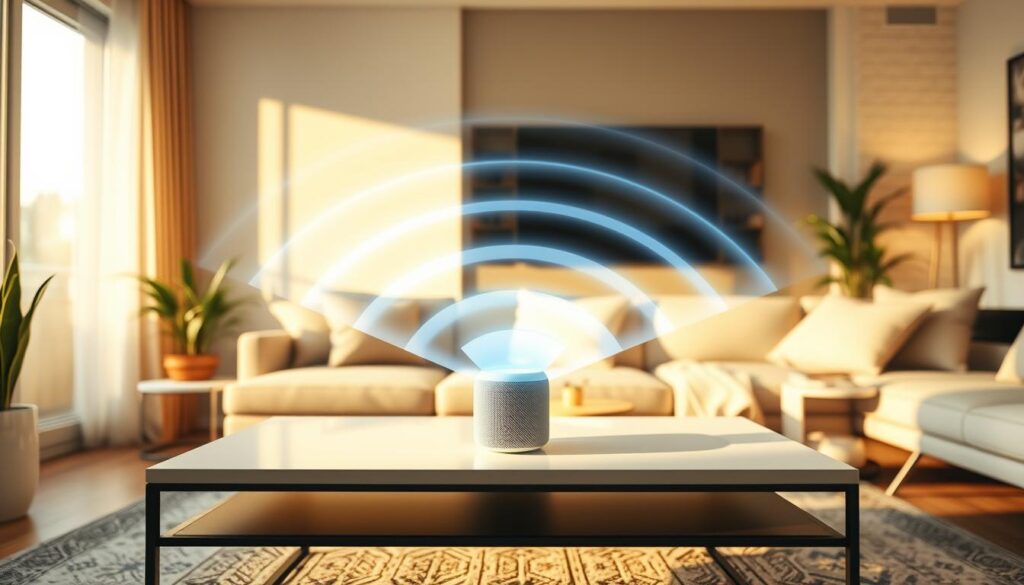
Connecting your HomePod to your home’s WiFi network is key to its full power. Without WiFi, you can’t stream music, control smart home devices, or use Siri. This part shows why WiFi is vital for your HomePod.
Unlocking the Full Potential of Your Smart Speaker
The HomePod is meant to make your home’s sound better. But, it needs WiFi to do its best. With WiFi, you get access to lots of music, podcasts, and smart home control with Siri.
Ensuring Seamless Streaming and Voice Control
A good WiFi connection is key for smooth streaming and voice control. Without it, you’ll face lag, interruptions, and less functionality. With WiFi, you get uninterrupted music, easy smart home control, and quick Siri responses.
| Feature | With WiFi Connection | Without WiFi Connection |
|---|---|---|
| Music Streaming | Uninterrupted, access to vast library | Limited or no audio playback |
| Smart Home Control | Full control over compatible devices | Minimal or no smart home functionality |
| Siri Voice Commands | Responsive, reliable voice control | Limited or no voice control capabilities |
Setting up your HomePod’s WiFi is key to its full power. By connecting it to your network, you unlock better sound, smart home control, and voice commands.
“The HomePod is a powerful smart speaker, but it’s only as good as the WiFi connection it’s connected to. Make sure to set it up properly for the best experience.”
how to connect homepod to wifi
Connecting your HomePod to your home’s WiFi is key to using it fully. Whether it’s a new setup or a network change, it’s easy. Let’s look at how to set up homepod wifi and configure homepod wireless connection.
- Make sure your HomePod is on and near your iPhone or iPad.
- On your iOS device, turn on Bluetooth and WiFi.
- If you’re on a public network, connect to it first before setting up your HomePod.
The how to connect homepod to wifi steps are simple:
- Open the Home app on your iOS device and tap the “+” icon.
- Choose “Add HomePod” and follow the instructions to set it up.
- Your HomePod will link to your WiFi network, keeping your settings and preferences.
With your HomePod connected to WiFi, you can enjoy its features. This includes voice-controlled music and smart home control.
Preparing Your HomePod for WiFi Setup
Before you can connect your HomePod to your wireless network, you need some important info. Make sure your network works with the smart speaker. This step will help you set up your HomePod easily and use all its features.
Gathering Necessary Information
First, gather the details you’ll need. Know your home WiFi network‘s name (SSID) and password. You’ll use this info when setting up. Also, if your network uses 802.1X authentication, like PEAP or EAP-TLS, get the needed credentials from your network admin.
Ensuring Compatibility with Your Network
Then, check if your HomePod works with your WiFi network. It supports many network types, including captive portals and 802.1X authentication. But, some network features might not work. If you have problems, reach out to your network admin for help.
By getting the right info and checking network compatibility, you’re ready for a smooth HomePod WiFi setup.

Step-by-Step Guide to Connecting Your HomePod to WiFi
Setting up your HomePod to connect to your home’s wireless network is easy. It unlocks the full power of your smart speaker. This guide will help you set up HomePod wifi and configure HomePod wireless connection in simple steps.
First, make sure your HomePod is on and close to your network. Then, follow these easy steps to connect HomePod to wifi:
- Open the Home app on your iOS device and tap “Add Accessory.”
- Your HomePod should show up in the list. Tap it to start the setup.
- Enter the eight-digit code on your HomePod’s screen if asked.
- The app will help you choose your network and password.
- Keep your HomePod and iOS device close for a smooth connection.
By following these steps, you can set up HomePod wifi and configure HomePod wireless connection easily. This lets you enjoy all your smart speaker’s features.
“Connecting your HomePod to WiFi is the key to unlocking its true power as a smart home hub.”
Once connected, you can stream music, control smart home devices, and use voice commands. Follow this how to connect HomePod to wifi guide to enjoy your HomePod’s convenience and versatility.

Troubleshooting Common WiFi Connection Issues
Having trouble connecting your HomePod to WiFi? We’re here to help. We’ll show you how to fix common network problems that might be stopping your smart speaker from getting online.
Identifying Network Problems
To fix your HomePod’s WiFi issue, first find the problem. Look out for these common issues:
- Weak or unstable WiFi signal: If your HomePod is far from your router or in an area with interference, you might have trouble connecting.
- Incorrect network credentials: Make sure you’re using the right password for your WiFi network.
- Network compatibility issues: Check that your HomePod works with your network’s security type (like WEP, WPA, WPA2).
- Network congestion: Too many devices on your network can slow things down and affect your HomePod’s performance.
Resolving Network Problems
Now that you know the problem, let’s find a solution. Here are some steps to help your HomePod connect to WiFi:
- Move your HomePod closer to your router to boost the signal.
- Double-check that you’re using the correct network name and password.
- Check your router’s settings to make sure it’s compatible with your HomePod.
- Try disconnecting other devices from your network to reduce congestion.
- If problems continue, you might need to reset your HomePod’s network settings or contact Apple Support for help.
By trying these steps, you should be able to connect your HomePod to your wireless network. This will let you enjoy all its features. If you’re stuck, don’t worry. Just ask for professional help.
Conclusion
In this guide, we’ve covered how to connect your Apple HomePod to WiFi. This lets you enjoy full features like streaming and voice control. It also gives you a personalized audio experience.
Setting up your HomePod’s WiFi is easy, whether you’re tech-savvy or new to smart home devices. Just follow the steps in this article. You’ll be able to stream music, control smart home devices, and use voice commands.
A strong WiFi connection is essential for your HomePod. Proper setup and troubleshooting ensure you get the most out of it. Enjoy high-quality audio and convenient voice commands. So, connect your HomePod to WiFi and explore smart home capabilities.
FAQ
How do I connect my HomePod to my home’s WiFi network?
To connect your HomePod to your home’s WiFi, follow these steps:
- Make sure your HomePod is powered on and in range of your wireless router.
- On your iPhone or iPad, open the Home app and tap the “Add” button.
- Select “Add Accessory” and follow the on-screen instructions to connect your HomePod to your WiFi network.
- Enter your WiFi network password when prompted, and your HomePod will connect to the network.
What information do I need to connect my HomePod to WiFi?
To connect your HomePod to your home’s WiFi, you’ll need a few things:
- The name (SSID) of your wireless network
- The password for your wireless network
- Confirmation that your wireless network uses a 2.4GHz band (HomePod does not support 5GHz networks)
How do I know if my wireless network is compatible with my HomePod?
To check if your wireless network is compatible with your HomePod, make sure it meets these requirements:
- Uses a 2.4GHz wireless band (HomePod does not support 5GHz networks)
- Has a strong, stable signal in the room where you’ll be using your HomePod
- Uses a standard wireless security protocol like WPA2 or WPA3
What should I do if I’m having trouble connecting my HomePod to my WiFi network?
If you’re having trouble connecting your HomePod to your WiFi, try these steps:
- Ensure your HomePod is powered on and within range of your wireless router
- Check that your WiFi network is functioning properly and that you have the correct network name and password
- Try resetting your HomePod by unplugging it, waiting 5 seconds, and then plugging it back in
- If the problem persists, contact Apple Support for further assistance
How do I know if my HomePod is successfully connected to my WiFi network?
To confirm your HomePod is connected to your WiFi, follow these steps:
- Open the Home app on your iPhone or iPad
- Look for your HomePod in the list of devices
- If your HomePod is listed and its status shows as “Connected,” then it is successfully connected to your WiFi network


2 thoughts on “How to Connect HomePod to WiFi: Easy Setup Guide”